This guide sets up ePSXe v2.0.18 — the current Windows release (December 23, 2025) — from a clean folder to a running game. It assumes the legal baseline used across this site: the emulator from the official source, games ripped from discs you own, and a PlayStation BIOS dumped from your own console.
1. Download and extract ePSXe 2.0.18
Download the Windows package from the official ePSXe website via our download page. The file is ePSXe2018.zip (1,551,309 bytes). You can verify it before extracting: its SHA-256 is ec0d0e235f839261818acc5118cd810a7193b0fbcbd339517f884dffc31792bb. Extract the whole zip into its own folder (for example C:\Games\ePSXe) — do not run ePSXe.exe from inside the zip window, and avoid Program Files, which can block memory card and config writes.
2. Add your BIOS (from your own console)
ePSXe does not include a BIOS, and the BIOS is copyrighted Sony firmware — the ePSXe readme says you may only possess it if you are legally entitled to it. Dump it from a PlayStation you own (see our legal BIOS guide), place the .bin file in the bios folder inside your ePSXe directory, then open Config > BIOS, select it and save. Skipping this step is the number one cause of the missing BIOS error and black screens.
3. Run the configuration wizard
On first launch, ePSXe walks you through BIOS, video, sound, CD-ROM and controllers. Sensible defaults for a modern PC:
- Video: Pete’s OpenGL2 core plugin for HD upscaling, or the internal GPU core for maximum compatibility. Details in our OpenGL2 settings guide.
- Sound: the internal SPU core. v2.0.18 improved its reverb and volume handling.
- CD-ROM: the internal WNT/W2K core if you play from images; an ASPI-style plugin is only relevant for real discs in old drives.
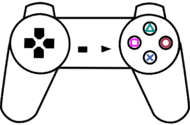
- Controllers: plug the pad in before you start mapping — see the controller setup guide.
4. Load your first game
Use File > Run ISO and pick an image ripped from your own disc: BIN/CUE, ISO, IMG, PBP, or CHD (v2.0.18 added CHD support for ISOs; our CHD guide covers converting your rips). If the game window stays black, work through the black screen fix before changing random settings.
5. Two settings worth changing immediately
- Options > DPI Awareness: new in v2.0.18 — enable it if menus look blurry on a high-resolution display.
- Config > Memory Cards: pick two .mcr files so saves behave like real cards. F1/F2/F3 handle save states (save, choose slot, load). Our memory card guide explains the difference.
That is a complete, honest setup. Everything else — prettier graphics, cheats, netplay — builds on this base, and the tutorials index collects those guides.